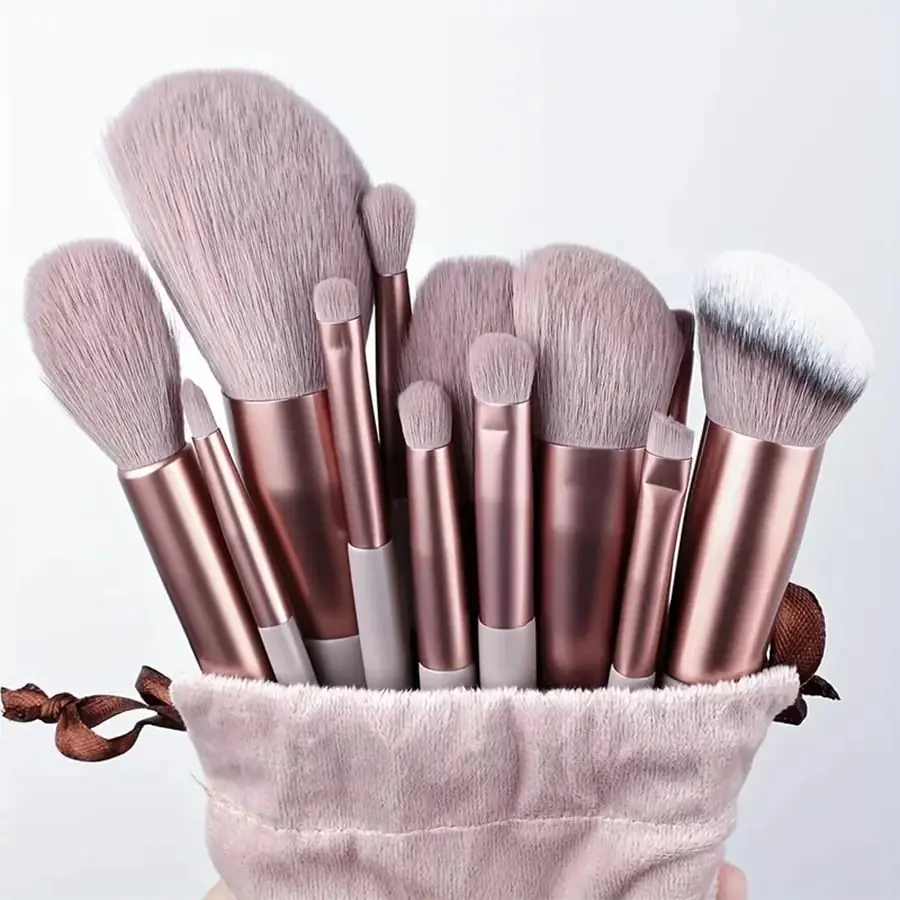
A makeup brush guide for beginners should make your routine smaller, not more complicated. A large brush set can look impressive, but most daily looks rely on a few repeatable jobs: spreading a thin base, placing powder where it is needed, adding color to the cheeks, pressing shadow onto the lid, and softening visible edges. Once you understand those jobs, you can identify a useful brush by its shape instead of depending on an arbitrary number or label.
This guide explains the common face and eye brush shapes, what foam applicators do differently, how to build a realistic starter kit, and how to clean and store tools without damaging them. It also separates useful features from marketing language. A brush does not become professional simply because a listing uses that word, and a 20-piece kit is not automatically better than a well-chosen set of six.
Choose by task, not by piece count
Start with the brushes required for the products you already use. Add a new shape only when you can name the specific step it improves.
The five brush features that matter most
Shape controls placement. A broad fluffy head spreads a light layer over a larger area, while a small flat head places product more precisely. Density affects how much product a brush picks up and deposits. Dense brushes generally apply more concentrated color or coverage; loose brushes tend to create a lighter veil.
Edge matters when you are blending around curves. Rounded and tapered shapes can fit the cheek or crease without leaving a hard rectangular mark. Fibre affects feel, cleanup, and how the tool works with different textures. Many modern beginner sets use synthetic fibres, but the actual material should be confirmed instead of guessed from a photograph. Construction includes the handle, ferrule, adhesive, and how securely the bristles are held. Persistent shedding, a loose ferrule, sharp edges, or a chemical odour are quality warnings.
Face brushes beginners are most likely to use
Powder brush
A powder brush is usually large, rounded, and relatively fluffy. It is useful for applying a light layer of loose or pressed powder without concentrating too much in one spot. Tap off visible excess, then press or sweep only where needed. People with dry skin may use powder selectively rather than covering the entire face.
Blush brush
A blush brush is smaller than a typical powder brush and may be rounded or slightly angled. Its job is to fit the cheek area and build color gradually. Start with less product than you think you need. Place the first touch where you want the strongest color, then blend the edge with the cleaner outer part of the brush.
Foundation or complexion brush
Flat paddle brushes spread liquid in thin strokes, while dense rounded or flat-top brushes buff with short movements. Neither style guarantees a better finish. Use a small amount of foundation, work in sections, and avoid aggressive circular pressure on irritated skin. A damp sponge can be easier when you want a sheerer result, but it must also be cleaned and dried properly.
Small setting or highlight brush
A small tapered face brush is versatile. It can place powder around the nose, set concealer lightly, or apply a controlled amount of highlight. Beginners often get more value from this shape than from several narrowly labelled contour tools.
Eye brush shapes and their real jobs
Flat shader brush
A flat shader brush presses powder shadow onto the eyelid. The flat surface gives the pigment more contact with the skin than a very fluffy brush. Load a small amount, tap off loose powder, and press rather than repeatedly wiping. This can reduce fallout and keep the color within the intended area.
Fluffy blending brush
A blending brush has a soft rounded or tapered head. Its job is to soften the boundary between colors, especially through the crease. Hold it farther back on the handle to reduce pressure. Blend the edge, not the entire area, or the colors may become muddy. Our eyeshadow guide for beginners demonstrates a simple placement order.
Small detail brush
A pencil-shaped or small rounded brush can place shadow near the lash line, deepen the outer corner, or smudge a narrow area. Because it deposits color in a small space, start with very little product. Use a separate clean brush to soften the edge if necessary.
Angled brush
A thin angled brush can apply brow powder or press shadow along the lash line. The edge should be even and firm enough to create control without scratching. If you use the same shape for brows and eyes, clean it between different products.
Foam eyeshadow applicators are not blending brushes
Dual-ended foam applicators can be useful for pressing shimmer or powder shadow onto the lid. Their compact tips can also smudge color near the lashes. They do not create the same diffused edge as a soft bristle brush, so calling them blending brushes is misleading. Alpha Glow Girl corrected one HHC supplier listing for exactly this reason; the photographs showed foam tips rather than bristles.
The draft 10-piece dual-ended eyeshadow applicator set is therefore described by its actual tool type. Use foam for placement and a soft brush for broad blending. Do not share eye applicators, and replace any tip that tears, loosens, develops an odour, or cannot be cleaned. The U.S. Food and Drug Administration’s eye cosmetic safety guidance also advises against sharing eye cosmetics and stresses cleanliness around the eye area.
A realistic beginner brush kit
For a basic makeup routine, consider one medium complexion brush or sponge, one powder or blush brush, one flat eye brush, one soft blending brush, and one small detail or angled brush. That is enough to learn pressure, placement, and cleanup. If you regularly use several face powders, multiple eye colors, or detailed looks, a larger coordinated set may reduce the need to wash one brush during the same routine.
The draft 13-piece makeup brush set with storage pouch includes a broader mix of face and eye shapes. Its value depends on verified bristle quality, ferrule stability, and whether you will actually use the shapes. The supplier shows pink and green versions but does not provide a reliable color choice, so the page discloses assorted color instead of promising a specific set.
How to judge a brush before keeping it
Run clean fingers lightly across the bristle edge. It should feel comfortable, not sharp or scratchy. Gently test the ferrule and handle for movement. A few loose fibres can appear in a new brush, but repeated shedding after careful washing suggests a construction problem. Inspect the handle coating for cracks and check for a strong odour that does not fade after airing.
Shape recovery is also important. After washing and drying, the bristles should return close to their intended form. A brush that permanently splays may lose precision. However, extremely soft fibres are not automatically superior: a useful brush needs enough structure for its task.
How to wash makeup brushes
- Wash your hands and prepare a clean towel.
- Wet the bristles with lukewarm water while keeping prolonged water away from the ferrule and handle joint.
- Use a small amount of mild cleanser and work it through the bristles without crushing them.
- Rinse until the water runs clear and no cleanser remains.
- Press out water gently with a clean towel. Do not twist the bristles.
- Reshape the head and dry the brush flat or with the bristles angled downward in a ventilated area.
Do not dry brushes upright while they are dripping because water can move toward the ferrule and weaken the adhesive over time. Avoid high heat from a hair dryer. The appropriate cleaning frequency depends on what the brush touches: a brush used with liquid complexion products often needs more frequent cleaning than one used occasionally with a single dry powder. Eye tools should be cleaned promptly when there is irritation or a suspected infection, and contaminated products may need to be discarded.
Drying and storage are part of hygiene
A clean brush can pick up residue from a dirty pouch or dusty cup. Wait until every part is dry before closing brushes inside a case. Clean the storage container regularly and avoid packing wet tools for travel. At home, a covered holder can reduce everyday dust, but it must not trap moisture.
The draft 360-degree rotating makeup organizer with lid offers covered compartments for frequently used tools. A smaller six-slot clear organizer keeps fewer items visible but uncovered. Choose based on the number and height of your tools, not just the appearance of the container.
Common beginner mistakes
- Buying duplicates: several brushes with almost identical shapes may not add a new function.
- Using too much pressure: this can move base makeup, create patchy shadow, and irritate skin.
- Loading too much product: gradual layers are easier to control than one heavy application.
- Blending everywhere: soften the boundary while preserving the intentional placement.
- Closing damp brushes in a pouch: wait for complete drying.
- Sharing eye tools: keep mascara wands, applicators, and brushes personal.
How brushes fit into a beginner routine
Tools cannot correct an unsuitable shade or an incompatible formula, but they can make placement more controlled. Follow the order in our step-by-step beginner makeup tutorial: prepare the skin, apply thin complexion layers, add cheek color, work on the eyes, and adjust only after seeing the full balance. Keep a clean towel nearby so you can remove excess product from a brush without repeatedly washing it during the routine.
When shopping, prioritize accurate photographs, a clear piece count, disclosed bristle material, color policy, and return terms. Be cautious when a listing promises a flawless finish, professional results, or harmless fibres without evidence. Technique, product formula, skin condition, and cleaning all influence the result.
Frequently asked questions
How many makeup brushes does a beginner need?
Many beginners can start with five or six useful tools: a complexion tool, a powder or blush brush, a flat eye brush, a blending brush, and a small detail or angled brush. Add shapes only when your routine needs them.
Are synthetic brushes good for beginners?
They can be. Synthetic fibres are common, often work with several textures, and can be straightforward to clean. Comfort, construction, shape, and verified material matter more than a broad natural-versus-synthetic claim.
Can I use one brush for several products?
Yes, when the shape suits each task and the brush is cleaned or wiped appropriately between colors and formulas. Avoid transferring eye products, strong pigments, or contaminated residue between areas.
How often should brushes be replaced?
There is no single schedule. Replace a brush when it sheds persistently, becomes scratchy, loses its shape, has a loose ferrule, develops damage, or cannot be cleaned adequately.
Should makeup brushes be stored upright?
Clean, fully dry brushes can be stored upright if the bristles are not crushed. After washing, dry them flat or angled downward first so water does not collect near the ferrule.