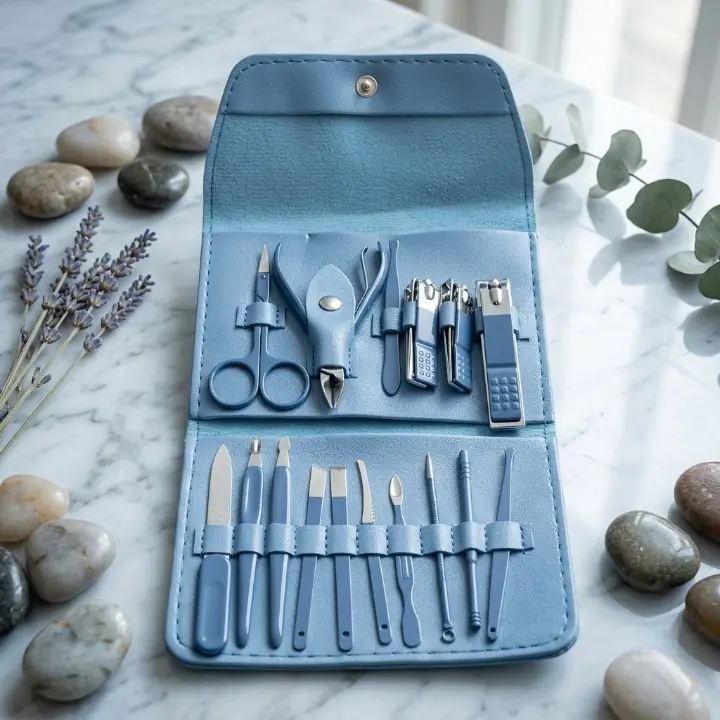
A careful at-home manicure is a maintenance routine, not a contest to remove the most skin or create the sharpest nail shape. Good results come from clean tools, controlled trimming, gentle filing, and knowing when not to continue. Painful swelling, drainage, a spreading color change, a deeply split nail, or a problem that keeps returning needs qualified assessment rather than aggressive cutting.
This at-home manicure guide explains preparation, nail trimming, filing direction, cuticle care, tool hygiene, polish preparation, and the limits of personal grooming kits. It is written for natural nails and basic cosmetic care. It does not replace medical advice or professional help for an injury, infection, or chronic nail condition.
Remove less and keep control
Short, conservative cuts and gentle filing are easier to correct. Deep trimming around corners or living skin can create pain and injury.
What you need for a basic manicure
A simple routine may require a nail clipper, a clean nail file, a soft brush, hand soap, a clean towel, moisturizer, and optional polish supplies. Tweezers or small scissors are only useful when their purpose is clear and you can control them. More tools do not automatically improve the manicure.
The draft five-piece compact manicure set is intended for basic personal grooming and travel. The larger 16-piece manicure and pedicure kit offers more shapes in a fold-over case. Both remain under sample and supplier verification; neither is described as professional or surgical grade without documentation.
Step 1: inspect your nails and surrounding skin
Before soaking, cutting, or filing, look at each nail in good light. Notice pain, swelling, heat, bleeding, drainage, a new dark streak, separation from the nail bed, or a significant color or texture change. Do not cover a concerning change with polish simply to hide it.
People with diabetes, reduced sensation, circulation problems, immune suppression, or a history of difficult foot wounds should ask an appropriate healthcare professional before doing aggressive nail or foot care. If you cannot feel pressure reliably, it is easier to cut too deeply without noticing.
Step 2: clean your hands and tools
Wash hands with soap and dry them. Remove visible debris from tools and clean them according to the material and manufacturer’s instructions. A tool should be dry, free from rust, and mechanically sound. Check that clipper jaws meet evenly, scissors move smoothly, and files are clean and intact.
The U.S. Centers for Disease Control and Prevention’s nail hygiene guidance notes that dirt and germs can live under fingernails and recommends keeping nails clean and trimmed. A cosmetic manicure should support hygiene rather than create small wounds.
Step 3: remove old polish gently
If you are wearing polish, use a remover that suits the product and your nails. Work in a ventilated area, avoid unnecessary skin exposure, and follow the label. Do not scrape polish off with a metal tool because this can remove surface layers from the natural nail.
After removal, inspect the bare nail again. Temporary staining from pigment can happen, but persistent or unusual changes deserve attention. The U.S. Food and Drug Administration provides an overview of nail care products and safety concerns.
Step 4: decide on length before clipping
Choose a practical length based on your work, hobbies, nail strength, and comfort. Very long corners catch easily; extremely short trimming can expose sensitive skin. If the nails only need a small adjustment, filing may be enough.
For fingernails, make several controlled cuts rather than forcing a large section through the clipper at once. Avoid tearing the remaining edge. Toenails require additional care because cutting deeply into corners can contribute to discomfort; people with recurring ingrown nails should seek professional guidance.
Step 5: file with control
Use a clean file with an appropriate grit. Support the finger and smooth rough edges with light strokes. Aggressive back-and-forth sawing can create heat and leave thin nails feeling rough. Many people prefer filing in one direction or using short controlled passes from the side toward the centre.
Common shapes include round, oval, square, and squoval. Match the shape to the natural sidewalls and the amount of free edge. Do not file deeply into the side of the nail to force a narrow shape; removing structural support can make the edge more vulnerable.
Step 6: be conservative with cuticles
The cuticle area helps form a protective seal around the nail. Do not cut living skin simply because it is visible. After washing, a small amount of loose dead tissue may be softened, but pushing or cutting aggressively can cause pain, bleeding, and a route for infection.
If you use a pusher, keep it nearly flat and use gentle pressure. Stop if the area hurts or turns raw. Do not use a sharp pointed tool beneath the cuticle fold. Hangnails can be clipped carefully with a clean tool close to the loose piece; do not pull them.
Step 7: smooth only what needs smoothing
Buffing can temporarily smooth ridges and add shine, but excessive buffing thins the nail plate. Do not try to erase every natural ridge. Use light pressure and limit frequency, especially if the nails are already thin, peeling, or damaged.
Ridges can have many causes and are not automatically a cosmetic defect. A new or pronounced change, especially with other symptoms, should not be repeatedly buffed away without understanding the cause.
Step 8: moisturize the hands and nail area
Apply hand cream and massage a small amount around the nail folds. If you plan to apply polish immediately, remove oily residue from the nail plate according to the polish instructions while leaving the surrounding skin comfortable. Moisturizer does not repair an infection or structural nail disorder, but it can reduce the dry feel around frequently washed hands.
Step 9: prepare for polish if you are using it
Follow the polish system instructions. Apply thin coats and allow enough drying time. Work in a ventilated space, keep products away from flame and heat, and close bottles promptly. Do not add unapproved solvents to change a thick formula.
A base coat may help with adhesion or staining depending on the formula. Color coats should be thin enough to dry. A top coat can change shine and wear, but no layer can compensate for wet, contaminated, or damaged nails.
How to clean manicure tools after use
- Remove visible nail dust and residue.
- Clean each tool using a method appropriate to its material and manufacturer guidance.
- Dry completely, including hinges and textured areas.
- Inspect for rust, chips, loose parts, and alignment.
- Return the tools to a clean, dry case.
Personal tools should not be shared without appropriate disinfection. A closed case keeps tools organized but does not make a dirty tool sanitary. Do not place damp metal tools into an airtight case where moisture remains trapped.
How to choose a manicure kit
Start with the tasks you perform: clipping, filing, handling an occasional hangnail, or travel storage. Check the piece count against the photographs, not just the headline. Look for even cutting edges, smooth hinges, secure handles, a case that closes, and clear material information.
Be cautious with “professional,” “medical,” “surgical,” and “stainless steel” claims when the supplier offers no documentation. Stainless steel is also a broad category; the phrase alone does not prove edge quality or corrosion performance. Alpha Glow Girl’s draft listings retain verification notes until a sample is checked.
Five-piece versus sixteen-piece kits
A five-piece kit is easier to understand and pack. It may suit someone who wants scissors, a clipper, tweezers, and a few basic tools. A 16-piece set provides more shapes, but some pieces may remain unused. The larger kit only offers better value if the tools are usable and the customer understands their purpose.
For either size, storage and tool control matter. Do not use a pointed tool simply because it is included. If you cannot identify a safe personal grooming use, leave it in the case until reliable instructions are available.
What not to do during an at-home manicure
- Do not cut deeply into nail corners to chase a perfectly straight edge.
- Do not cut or scrape living cuticle tissue.
- Do not dig beneath the nail with a sharp tool.
- Do not share unclean clippers, scissors, files, or pushers.
- Do not cover pain, drainage, or a suspicious color change with polish.
- Do not use a rusty, bent, loose, or chipped tool.
- Do not keep cutting when visibility or control is poor.
When to stop and seek qualified help
Stop home care for persistent pain, increasing redness, warmth, swelling, pus or drainage, bleeding that does not settle, a nail lifting unexpectedly, a deep split, a dark mark that is new or changing, or a problem that repeatedly returns. This list is not diagnostic. It is a reminder that cosmetic tools cannot safely solve every nail concern.
If an injury happens, clean the area appropriately and seek medical advice when the wound is deep, contaminated, worsening, or associated with reduced sensation or other health risks. Do not continue using the same tool on other nails until it has been cleaned and the situation is understood.
How often should you do a manicure?
There is no required schedule. Trim and file when length or rough edges become inconvenient. Avoid frequent aggressive cuticle work and buffing. A low-intervention routine often protects the nail better than repeatedly removing tissue for a freshly manicured appearance.
Between full routines, keep nails clean, moisturize dry skin, wear appropriate gloves for prolonged wet work or cleaning chemicals, and use tools only when needed.
Traveling with manicure tools
Sharp tools may be restricted in cabin baggage. Check the current airline, airport, and destination rules before packing. Keep the set closed, clean, and dry, and use checked baggage when required. Do not rely on a compact case to override security restrictions.
Frequently asked questions
Should cuticles be cut during a home manicure?
Avoid cutting living cuticle tissue. Gentle care of loose dead tissue is different from removing the protective nail fold. Stop if there is pain or bleeding.
Is it better to clip or file nails?
Clipping is efficient for significant length; filing is useful for smaller adjustments and smoothing. Many people use both: conservative clips followed by gentle filing.
Can manicure tools be shared?
Personal tools should not be shared unless they are cleaned and disinfected appropriately. Sharing unclean sharp tools can transfer biological material.
Does a 16-piece kit give a better manicure than a 5-piece kit?
Not automatically. A smaller set of well-made tools you understand can be more useful than a large set with unverified quality or unfamiliar pieces.
How should tools be stored?
Clean and dry tools completely, inspect them for damage, and keep them in a clean dry case away from children. Do not trap moisture around metal hinges.